The 50th birthday is a big deal! After all, you are 1/2 way to a hundred and that is 1/2 a century!!!
For my husband, the first thing I did was create a secret Pinterest board for 50th Birthday. From those ideas we got many of our own and incorporated it into our party.
This post contains affiliate links. I include these links for your convenience to be able to find similar items to what I am using. I earn a small commission for the referral, but your price remains the same.
Taco Bar
The taco bar was a perfect idea, because he loves tacos! I believe this is where I got the beginning ideas from and then made it work for us.
I wish I had better photos with the food uncovered! There was a lot of smoke in the air from forest fires and ash kept dropping from the sky! Not to mention the bugs, flies and wasps.
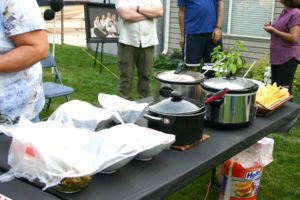
Everything is covered to keep the bugs, bees, flies and ash out of it for as long as possible.
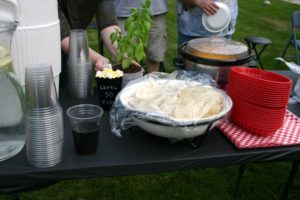
We put some basil plants on the table to try and help with the bugs. My daughter also wiped the table with almond extract to help keep the bugs down. It did seem to help, some.
Our taco bar included: pulled pork, hamburger cooked with taco seasoning, refried beans, sliced olives, jalapeños, cheese, sour cream, onions, tomatoes, corn flour taco shells, and crispy corn flour shells. We also had nacho cheese and corn chips.
The Details
It’s the little things that people may or may not notice that make it fun!
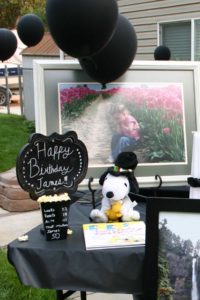
At this end of the table, we have a favorite photo that he took of our daughter when she was 2. He loves Snoopy and Woodstock. The book on the table is one to give him a hard time. It is Dr. Seuss- A book for obsolete children.
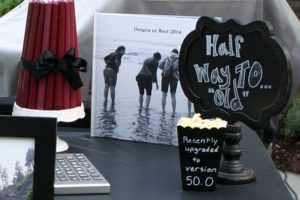
Here we have a computer reference in the decorations, a book about a family vacation and other things to celebrate aging. Very large TV remote a chalk sign and the 50 candles

Don’t forget the black balloons! (Clickable links)
Having your own helium tank helps, it is hard to transport all those balloons once they are blown up!
Creating a Timeline
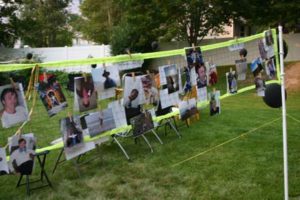
We gathered photos from his life and put them in categories of the decades from when he was born to present day. We added a few more categories like: “Why We Wait”, “Our Dad” and “Favorites”. Everyone enjoyed looking at the photos and seeing him the way we see him. My youngest daughter made the category signs and we hung them on the volleyball net. It isn’t to it’s full height, so it would be easier to view the photos.
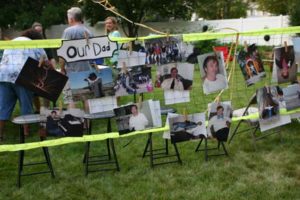
This last section was called “Our Dad” because no one knows him the way we do.
This takes us to present day.
We had photos for every decade of his life.
My husband doesn’t have a lot of photos from before we got married. We recently reorganized the house and I couldn’t find his high school photos, so there aren’t many of those.
The time line photos were fun to gather and put together. It turned out to be everyone’s favorite part of the celebration. It was a great way to honor him, his life, the father and wonderful husband that he is!
The Candles
This was by far my favorite decoration and thing to do at the party!!! I got the original idea here.
They were more challenging to put together than I had anticipated but it worked out great! Check out the instructions here.
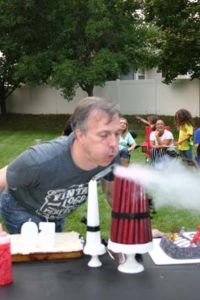
Thank goodness this was an outdoor event! I had not anticipated such a large flame!
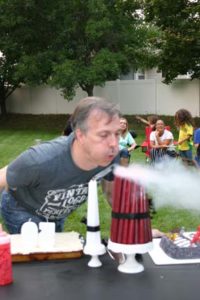
He huffed and he puffed and he blew them all out with one great big breath!
The Music
One of my daughters was in charge of music. She organized a play list that included songs from 1968 to present day. It was a lot of fun to hear the old songs as well as more current music.
The music really added to the ambiance. It was played from a smart phone to a sound bar speaker.
Birthday Attire
This was one of the hardest decisions! What were we going to make him wear?!
The Cake/s
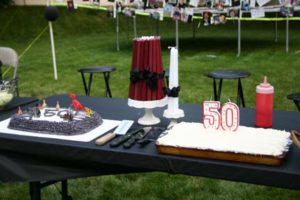
Because our party focused on Dad’s favorite things. We ended up with two cakes. The first one is his absolute favorite and my youngest daughter enjoyed making it for him: Applesauce Spice Cake (gluten free, of course) with cream cheese frosting. Recipe here.
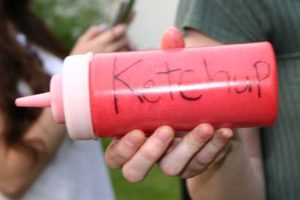
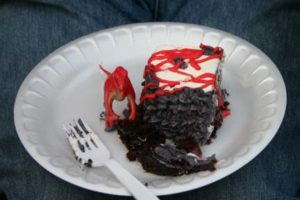
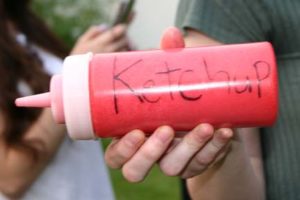
The second cake, my oldest daughter enjoyed putting together, with help from the other sisters. It had to be chocolate. Dad’s favorite story to tell is about when he was in 1st grade and put ketchup on his chocolate cake. However, before he could taste this anticipated deliciousness, the janitor came by, looked at the ketchup on the chocolate cake and said, “We don’t put ketchup on chocolate cake.” and the janitor threw it away.
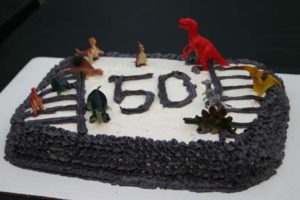
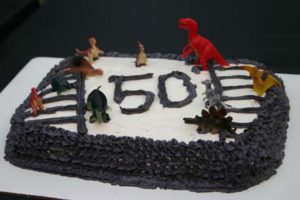
They thought it would be funny to put dinosaurs on because now dad is so ancient
My daughters conspired a trick to play on him and for a moment he was tricked into thinking they were putting ketchup on his chocolate cake.
I hope these ideas help you make your celebration wonderful and fun!
We wanted to make my husband’s 50th birthday celebration a lot of fun for him. My husband didn’t have birthday parties as a child and since we have been married they have been family parties. But being the Big 5-0, we wanted to do something special!
We had him wear his new, special shirt!
“Vintage 1968, Aged-perfection, Genuine- All original parts- mostly”
Favorites
We decided to invite some of his favorite people and have some of his favorite things.
We had a taco bar for dinner. I wasn’t able to get a good picture of things uncovered. The flies, bees and little bugs and ash made things difficult.
Ash? Yes, ash. There are so many big forest fires in our state right now and a lot of smoke has blown in from California’s fires that our air quality has never been this bad! I have never seen it this smokey before! And the ash was falling and obvious on our black covered tables, which we kept wiping off.
This post contains affiliate links. I include these links for your convenience to be able to find similar items to what I am using. I earn a small commission for the referral, but your price remains the same.
Favorite Food
We covered the tables with a black covering. I had intended to write with a white chalk pen what everything on the table was, but ran out of time.
Everything is covered to keep the bugs, bees, flies and ash out of it for as long as possible.
We had pulled pork, hamburger taco meat, refried beans, cheese, salsa, onions, tomatoes, olives, guacamole, jalepeños, corn flour taco shells, and crisp corn taco shells.
At the other end of the table we have nacho cheese, corn chips and some Baskets with Checkered Food Wrapping Papers (just for the fun of it.) if people wanted to put their nachos in them. My daughter made homemade root beer!
We put some basil plants on the table to try and help with the bugs. My daughter also wiped the table with almond extract to help keep the bugs down. It did seem to help, some.
Favorite hobbies and more
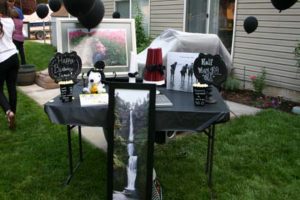
We had one table set up that was about James and his hobbies and things that he likes.
There’s a lot of photography items on this table. Most of the art work in our home is from the photographs he has taken. The waterfall also represents a favorite vacation and the book and pictures of our kids because family is really important.
He loves snoopy and so we have a snoopy on the table as well. I tried to find some computer stuff but couldn’t locate anything I felt would be appropriate on the table.
Here we have a computer reference in the decorations, a book about a family vacation and other things to celebrate aging. Very large TV remote, a chalk sign and the 50 candles.
At this end of the table we have a favorite photo that he took of our daughter when she was 2. He loves Snoopy and Woodstock. The book on the table is one to give him a hard time it is Dr. Seuss- A book for obsolete children.
Favorite Cake
My youngest daughter made him his favorite cake! Gluten Free Applesauce Spice cake with cream cheese frosting.
My daughter was in charge of decorating the cake as well as making it. LOL
My oldest daughter made a second cake. Chocolate isn’t really his favorite, but she and daughter #3 had a joke they wanted to play.
Decorated with dinosaurs because Dad is so “ancient” now.
The Birthday Joke
My husband often tells the girls about the time he was in 1st grade. He got chocolate cake in the cafeteria and then he saw the ketchup. He put the ketchup on his cake and sat down to try it out. Before he could, the school janitor came by and saw the ketchup on his cake. The janitor grabbed his cake and said, “We don’t put ketchup on chocolate cake,” and threw it into the garbage!
He has always been so disappointed to not have tried ketchup on chocolate cake. However, every time we tell him now is his chance he decides he doesn’t want to try it.
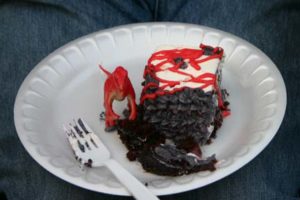
My daughters made a runny frosting with some raspberry and vanilla flavorings and put it in a bottle labeled ketchup. After serving him his chocolate cake they presented the ketchup and squeezed it on his cake. He had a few moments of panic before realizing it wasn’t really ketchup. It was a great joke!
It almost does look like ketchup!
He’s a good sport! Trying to get over the shock of thinking it was ketchup for a minute.
Ketchup. . . or is it.
Party Music
Daughter #2 was in charge of the music. She put together a play list with songs from the 5 decades that are a part of his life. It was a lot of fun and added so much to the atmosphere!
50th Birthday Decorations
My favorite was the time line photos we put together of his life. We set up a volleyball net and didn’t put it to it’s full height, so it would be easier to view the photos.
My youngest daughter was in charge of making the time line descriptions.
My husband doesn’t have a lot of photos from before we got married. We recently reorganized the house and I couldn’t find his high school photos, so there aren’t many of those.
We had photos for every decade of his life.
This takes us to present day. We also have a category for “Why We Wait”. These are pictures my girls have taken of him talking to strangers and taking strangers pictures. We often joke as we wait that Dad has made a new friend, again.
We then included our “Favorite Moments”
This last section was called “Our Dad” because no one knows him the way we do.
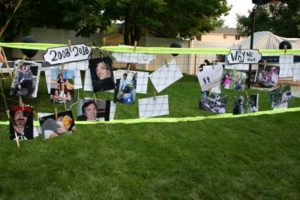
The time line photos were fun to gather and put together. It turned out to be everyone’s favorite part of the celebration. It was a great way to honor him, his life, the father and wonderful husband that he is!
The little details
He didn’t realize all of the little details, until he was looking at the photos. That’s okay, almost everyone else did.
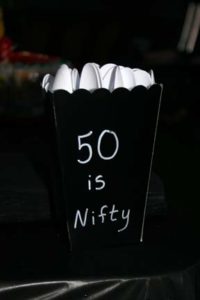
50 is Nifty
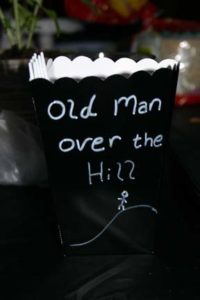
Old Man Over the Hill
Recently upgraded to version 50.0
Looks 22, feels 18, Acts 10 That makes James 50
Level 50 Unlocked
Favorite Hot Air
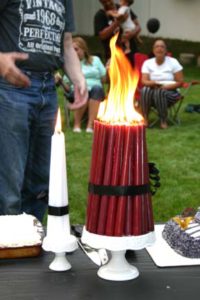
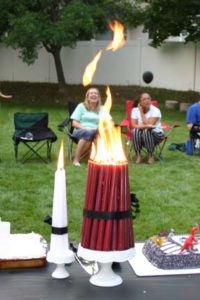
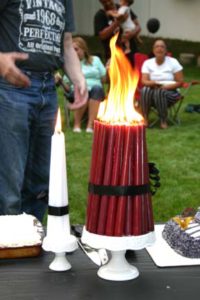
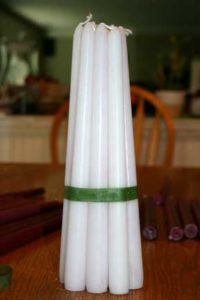
Of course we had to light ALL of those candles! I missed 4 candles when putting it together and didn’t want to short him his 50 wishes. So that is why there are two groups. They were tricky to light. It’s a good thing I worked on getting them stable. A friend picked the bundle up and held them on their side while I lit the bottom ones, which then helped to light the rest. When we set it back down there were only two or three I had to light. Click on this link to see directions in putting the candles together.
Wow! Look at that flame!!!
This picture is crazy! I don’t know what the flame is doing here. I’ve never seen anything like it.
He was worried his eyebrows were going to be burned.
Look how his inhale disturbs the flame!
He actually did it! One big, giant breath! He was a French horn player in high school and it looks like he’s still got it!
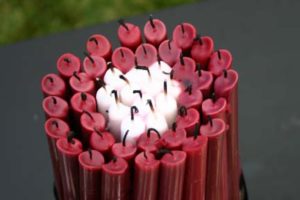
Wow! Look how they have melted together! This was a favorite part of the party for everyone!
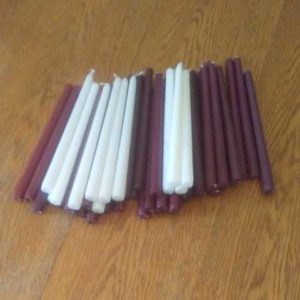
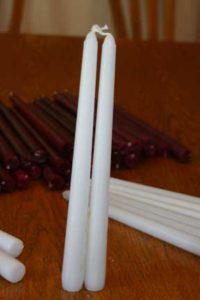
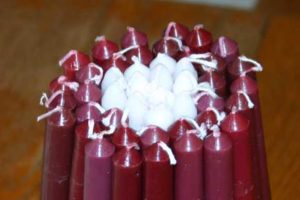
I saw this fun idea on Pinterest while I was planning my husband’s 50th birthday. I went to the dollar store and found candles. At first, I was hoping to find all black or all white, but these are the colors they had. If I had been a little more on the ball I probably would have ordered all black candles from amazon!
At the dollar store, I bought ALL the candles they had. It worked out well, because it kind of looked like a target.
Experimenting with the Candles
Putting the candles together was more challenging than I had anticipated. I wanted to make sure that if they got bumped, they didn’t separate.
First, I tried using tape. . .
It wasn’t very stable and as you can imagine, tape doesn’t stick well to wax!
Next, I tried hot gluing them. . . It worked for a little while. They held together and they were stable enough to stand. But, once the glue cooled it wasn’t so great! They easily came apart and the glue came off, leaving a melted place in the candles.
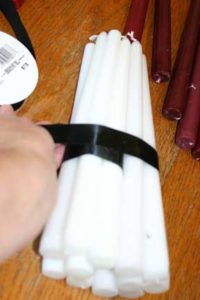
Then, I tried tying them with ribbon and rolling them together. It almost worked! But, they weren’t very stable and did a lot of sliding. If the ribbon slides up the candles become too loose, since they are tapered. I was trying to push more candles into the ribbon to help tighten it and didn’t realize the ribbon was sliding up and getting it to come back down was really hard.
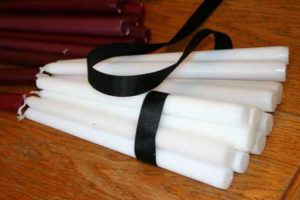
I thought it was working and then had all kinds of problems and it wasn’t as stable as I was going for.
This post contains affiliate links. I include these links for your convenience to be able to find similar items to what I am using. I earn a small commission for the referral, but your price remains the same.
Instructions for 50 Candles
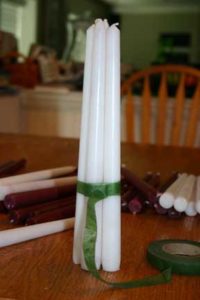
Finally, I tried floral tape. If you have never used floral tape before, here is what you need to know: 1. it is sticky but in a waxy kind of way, 2. gently pull the tape as you wrap. This stretches it a little bit and helps it to stick.
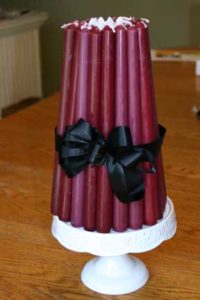
First, just wrap one candle with the floral tape. You want it just below where the candles really start to taper. Then, add in 2 or 3. Make sure your candle bottoms are even with one another as you go, so it will sit flat without wobbling. I wrapped the grouping once or twice all the way around and then added more candles in. It is helpful if you have someone who can hold the candles in place while you wrap.
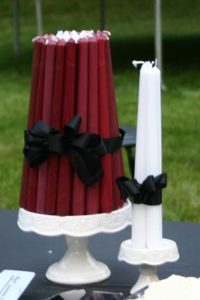
Once I had all the candles wrapped, I took some black ribbon and wrapped it around the floral tape, to cover it up. Securing it with a dab of hot glue. I tied a black bow with the help of some floral wire and secured it to the ribbon.
It does look kind of like a target. In any case, it looks very cool! However, my husband counted and was dismayed that there were only 46 candles! What?!!! Then, I discovered that 2 boxes of candles had been missed! (I was trying to be so careful to not have that happen!) Ugh! There was no way I was going to undo those candles to add the 4 missed! So, we made them into their own grouping with their own pedestal.
I wish all 50 would have been together in the big grouping, but sometimes you gotta work with what you’ve got!
Materials Needed
Floral tape
50 candles
hot glue
black ribbon
Lighting it on fire!
Of course, we are going to light it! Thankfully he has a summer birthday and so we can be outside to do this! Didn’t expect the flame to be so big! This was a highlight of the party!
One Big Breath!
He did it! He blew them all out with one big breath! He was a French horn player and he still has great lung capacity!
Our goals in visiting Garden City for Raspberry days were to get fresh Bear Lake Raspberries, enjoy raspberry shakes, and go out to Bear Lake. The best time to do this is the first weekend in August, when the city is celebrating Raspberry Days. Of course, Bear Lake is fun anytime during the summer, but there is a lot to do and see during their city celebration.
Unfortunately, I didn’t take as many pictures as I should.
Garden City, Utah
Garden City, Utah is located in Northern Utah. To get there you first need to make your way to Logan, Utah. From there it is only about a 45 minute drive to Garden City. The road into town will end at a 4 way T (if you go straight, it is into a parking lot). Just before getting to the stop sign, you will see carnival rides and many, many vendor tents.
Garden City’s Raspberry Days celebration is one of the best city celebrations we have gone to! They have a large quantity of booths, a great variety of vendors and many food options (especially, if you aren’t gluten free, not as many options if you are gluten free).
If you want to really have an adventure, try sleeping in a Conestoga wagon at the Conestoga Ranch! They have a lot of options and a great restaurant (must make reservations). The atmosphere is awesome!
Raspberry Shakes
You can’t go to Garden City especially during Raspberry Days without getting a raspberry shake! You will see many places advertising raspberry shakes and one that has the claim of “Most Famous Raspberry Shakes”. The line there was unendingly long and slow!
So, off the beaten path we went and found:
Least Famous Shakes
Zipz had their sweatshirts on sale. Teens and their sweatshirts. . .
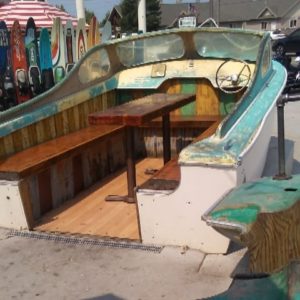
Why not?!!! They were pretty good! This cute little place is called Zipz. They also have a pretty good strawberry lemonade. They have a fun atmosphere too! If my kids were younger they would have loved sitting at the boat tables!
This post contains affiliate links. I earn a small commission for the referral, but your price remains the same.
Bear Lake
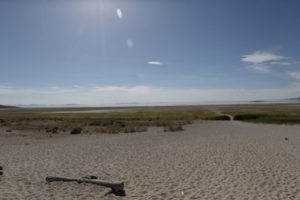
We wanted to go down to the lake, but we had our dog with us. Some of the beaches don’t allow dogs on them. So, we decided to go for a drive and see what we could find.
We stopped at the Visitor’s center, but by the time we got there (since this was an afternoon adventure) it was closed. I think it closed at 4:00 p.m. So, just before we made it there.
We found the next beach place that allowed you to take pets on the beach. It is a state park and they charge $10.00 for the day. We were bummed because we only wanted to be there 30-60 minutes. The girls thought it would be fun to drive all the way around the lake and see what we could find. They also wanted to go into Idaho, since part of the lake is in the next state.
Turns out, until you get to the south east side and the south west end, there aren’t any free beaches that allow pets. In fact the majority are run by either Utah or Idaho and charge $10.00 a day. Not bad at all if you are spending the day. There are some nice beaches to play on.
Around the Lake
We started on the west side and made our way north. We were more than 1/2 way around the East side when we ran into signs saying the road was closed. Seriously?!!!! This should have been a warning before going so far around the lake! Ughhh. We had to make a decision do we try the “closed road” it didn’t look bad at all.
We decided that rather than turn around, after having come so long, we would go for it! No one was out doing road work. There were campsites all along the way where people were camping. So, the closed road wasn’t really that closed.
Eventually, we hit dirt road. It was pretty rough in our mini van, but doable (everything is doable in the mini van, as far as my husband is concerned.). We took it slow and it was a very pleasant ride. Until all the dirt got stirred up from big trucks passing us.
There was an awful lot of smoke in the air, much of it being blown in from the California fires. Then we had the dust from the dirt road. I don’t have asthma attacks very often, but it all got to me. I was miserable! Thankfully, my daughter had brought her essential oils along. I was able to apply soothing air to my throat and chest and it calmed it right down! Thank heavens. This could have been really bad.
The Boat Dock
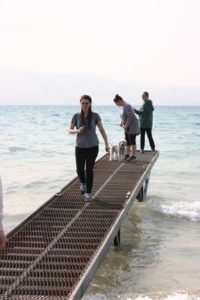
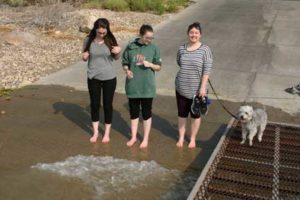
We found a place where people take their boats and put them into the lake. We decided to stop there and use the bathrooms, stretch our legs and dip our toes in the water.
Sometimes I think my dog is part cat. She thought the water was too cold.
Here there isn’t much of a beach. If you walk a little farther north of the boat dock, there is a picnic table and a little bit of a beach. However, where we were it was very rocky.
The water was really choppy
South West Bear Lake
Turns out had we turned the other direction and headed south first, that is where all the access is located. There are more free beaches with pets allowed! We were pretty tired by the time we made it around the lake. We were ready for some real food and I wanted a flat of raspberries to bring home!
We went back to the vendors and unfortunately the one we wanted to buy from, sold out 15 minutes before we got there. Luckily, there was another vendor, but theirs didn’t look as good as the other guy. Still, I was glad to get my flat of raspberries! When we got home I washed and dried them and put most of them in the freezer.
One of my favorite things to make with fresh raspberries is raspberry lemonade!
Gluten Free
We didn’t find a lot of places that we felt were very safe for doing gluten free food. Part of the reason for this is because we have one daughter who hates Mexican food. There was a very safe Mexican restaurant, but she wouldn’t go for it. No one had gluten free French fries.
So, we did dinner back in Logan at Chick-Fil-A. French fries are safe and we could eat outside with the dog.
For us this was a much needed, laid back adventure. It would be so much fun to stay in Garden City, sometime, and rent some water equipment and play on the beach! There are several places to rent equipment.
Smokey sunset taken in Logan Utah
The sunset in Logan, Utah was amazing! We didn’t have our good camera with us, but the sun was a brilliant bright red! As difficult as the smoke was, it sure made a beautiful sunset!
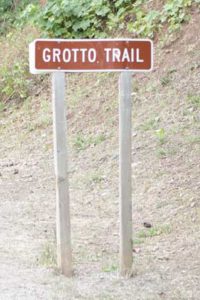
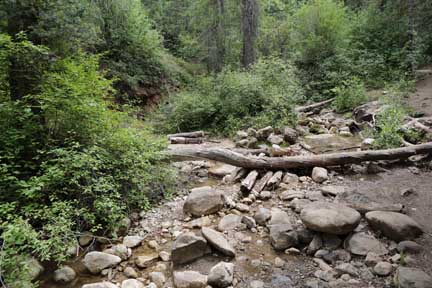
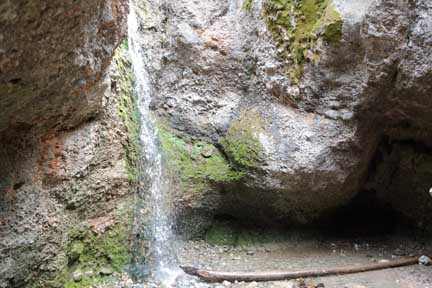
When we heard about the Grotto Trail, we had to go!
Payson, Utah
Payson, Utah is about 40 minutes south of Provo. The I-15 is the fastest way to get there. Take the Payson Exit #254. You will drive through the pleasant city of Payson to get to the canyon. Hiking in Utah has great directions for getting you all the way to the grotto and through the city!
Once you get to the mouth of the canyon it is 7 miles to the Grotto Trail. There is parking on both sides of the road. However, the parking is in the “U” of the road. Be careful with your little ones, it can be precarious getting across the road.
This post contains affiliate links. I include these links for your convenience. I earn a small commission for the referral, but your price remains the same.
The Grotto Trail
This was a very easy hike! It is only .3 miles long.
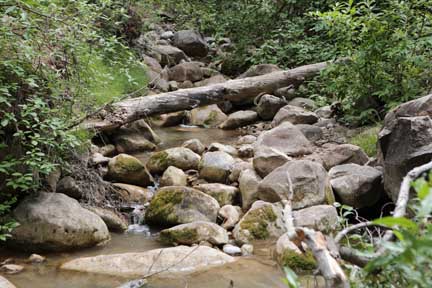
The trail is pretty nice and has bridges to get you across streams. Though, being Utah that means that the bridges aren’t always needed. Just like our trip to Antelope Island, the water levels are much lower this year because we are in a drought.
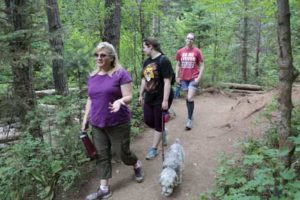
It is a pet friendly area. We took our dog with us and there were many dogs along the trail. Dogs do need to be on a leash and cleaned up after.
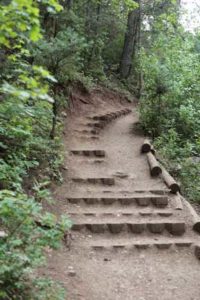
I’m sure this was an Eagle Scout project and it made the hike up the trail a little easier. Over time the erosion has smoothed out the places between some of the steps.
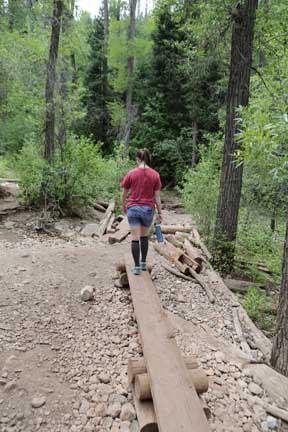
There are several bridges that help to cross over ravines and streams
The Grotto
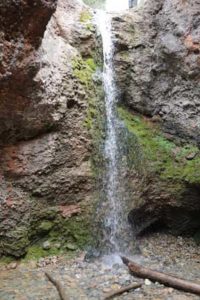
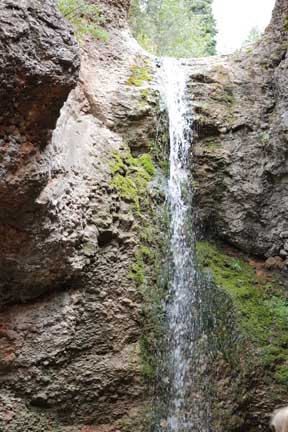
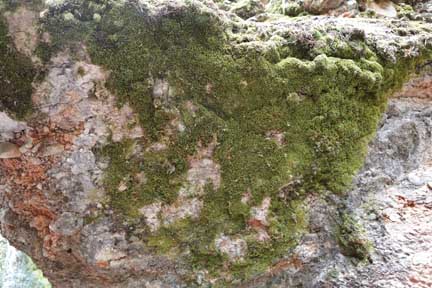
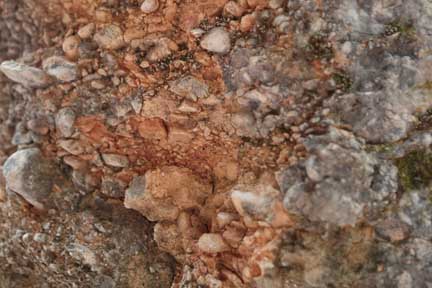
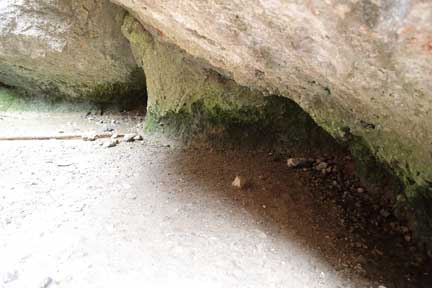
The Grotto is nestled back between walls of rock and dirt with a little pool at the bottom. While we were there, it was quite busy. It is a popular place to visit.
It really was busy. My husband did a good job getting some photos without the crowds!
This picture is more representative of the crowds.
It is a fun place to wade in the water. Water shoes or flip flops are great for playing here. Make sure you also bring a towel to dry off.
This is a fun little excursion that doesn’t take a lot of time to get to. It gets you out of the city and is so relaxing to be out in nature.
We took a late afternoon trip to Antelope Island in Utah. This island is located west of Syracuse, Utah. The island is 28,022 acres. You can hike the length of the island, but can only drive part of it. The island is most enjoyable in the late spring/early summer and early fall.
Driving on to the island
There is an entrance fee of $10.00 per car for Antelope Island, for the day. The hours for the island vary according to what time of year you visit, so make sure you plan ahead.
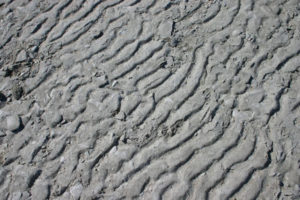
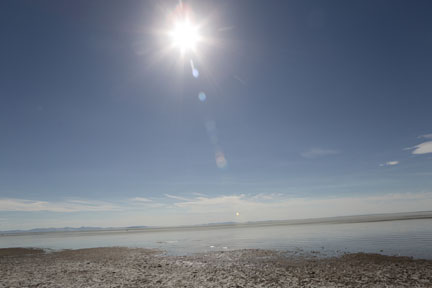
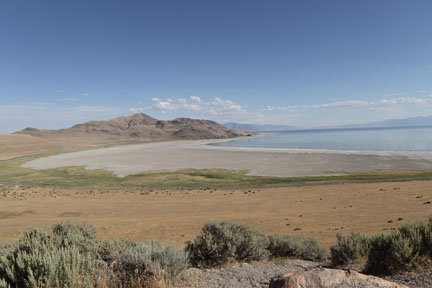
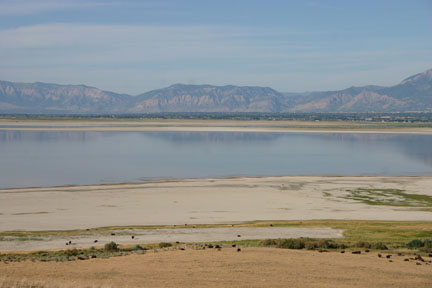
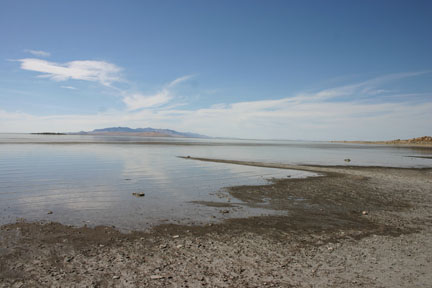
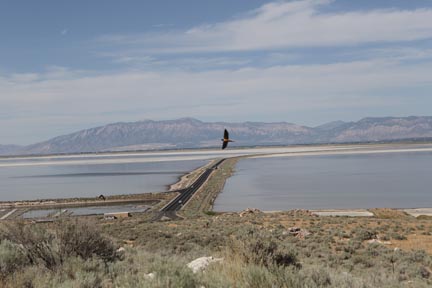
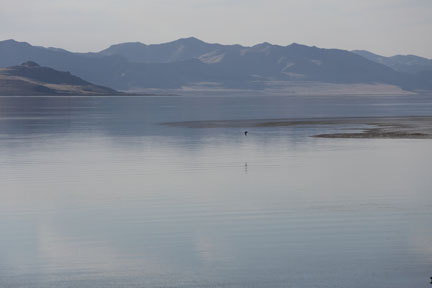
This past winter was really mild. We are in a drought and the lake shows it. The waters are really low. Sometimes, when you go out to Antelope Island, there is water on both sides of the road. Other times, it is very swampy. However, this year it is mostly dry. The water is quite a ways away from the road. There’s a little more water on one side than on the other.
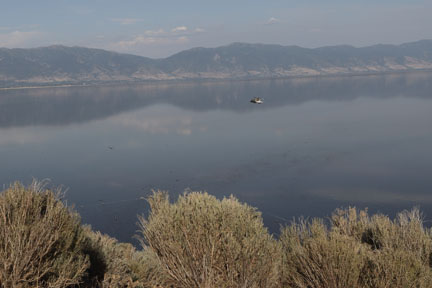
This is the south side of the road going onto the island. It has more water and I like how the hills are reflected in the water.
The north side of the road has a lot less water and looks like salty flats.
This is the north side of the road, driving onto the island. Lots of sage brush, and salty flats.
You can’t drive all the way around the island, but you can see a great deal of it by driving in your car. Make sure you stop at pull outs and view points. Those are often the areas where the animals can be seen.
This post contains affiliate links. I earn a small commission for the referral, but your price remains the same.
Hiking on Antelope Island
There are lots of places to hike on Antelope Island. When you pay your entrance fee the attendant will give you a map of the island showing where the trails are and the biggest pull out areas. Several areas have trails that will take you down to the water.
It is really hot! This is the desert and there isn’t a lot of shade. Make sure you have plenty of water and sports drinks to keep hydrated and your electrolytes up.
Watch your step as you are hiking these trails. They aren’t smooth. They are rock filled and it can be easy to trip. That being said, we did see a girl on crutches making her way up the trail.
Stay on the path
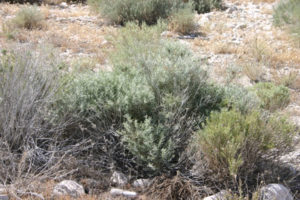
I highly recommend staying on the paths. There is a lot of wildlife on Antelope Island and you don’t want to put yourself in danger. The island is covered in sage brush. (Watch out for ticks.) One thing we have never noticed when visiting the island were the spiders. We weren’t expecting to see so many spiders!!!
Arachnid Island?
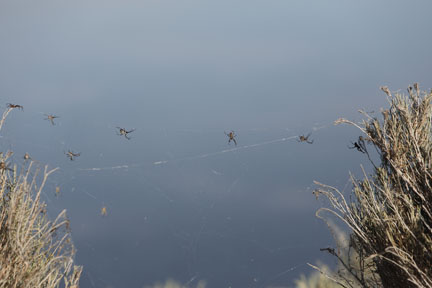
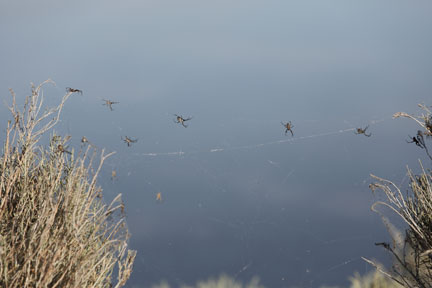
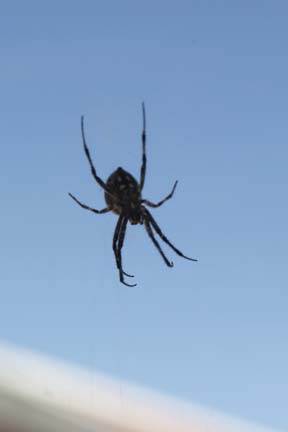
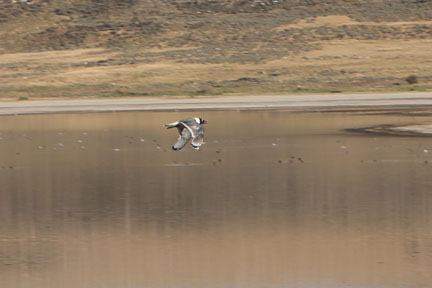
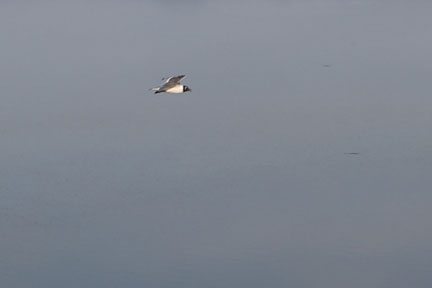
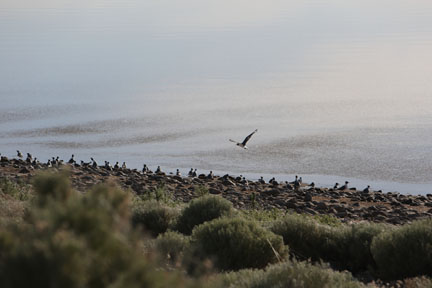
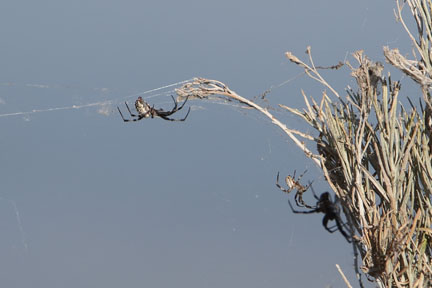
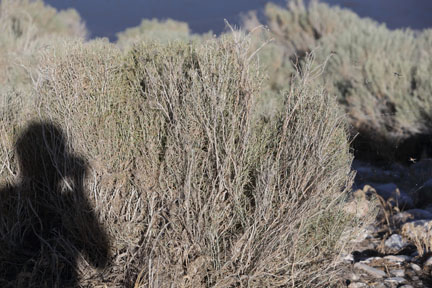
We stopped to take some pictures of birds skimming the water when we noticed all the spiders!!! Yikes! From the car, me and the girls were counting the spiders we could see. We counted over 20! Then, my husband’s shadow went across the sage brush and the whole thing moved! There were thousands of spiders!
We were in the car screaming and pretty freaked out by how many spiders there were. There was a woman across the street who came running over to see what all the commotion was. She quickly decided to stay on the other side of the road.
The first spiders we found were in the window of the gift shop.
Down to the water
If you are adventurous you can swim in the Great Salt Lake. Many of the areas that lead down to the water, have restrooms and showers.
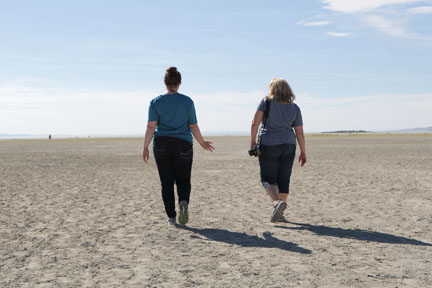
We were really worn out after trudging across the sand in the heat. Make sure you take your water with you, so you stay hydrated.
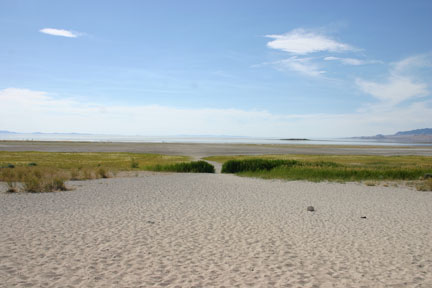
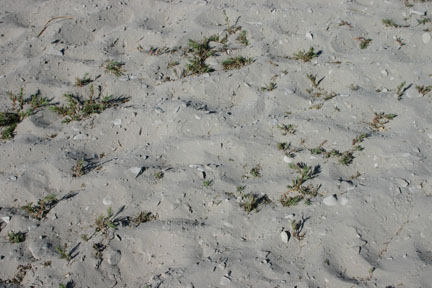
There is a lot of sand to trudge through to get to the water. Especially right now with the drought.
The sand has rocks through it in many places, so be careful as you go.
As you get to where the water has receded, because of the drought, the sand is packed pretty hard.
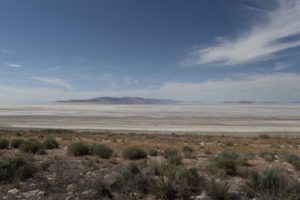
Along the water are brine flies. They don’t fly far off of the ground. They are kind of annoying. Here you can see them. They are dark along the water. Water shoes are nice to have for playing around and in the water.
Antelope Island Wildlife
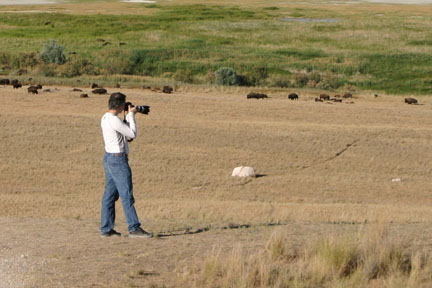
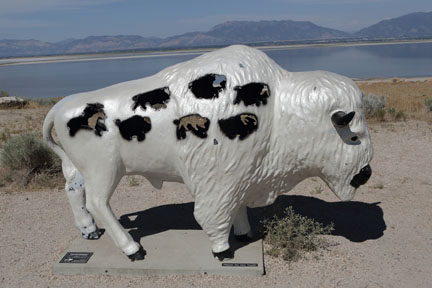
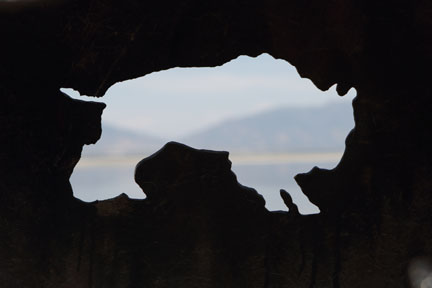
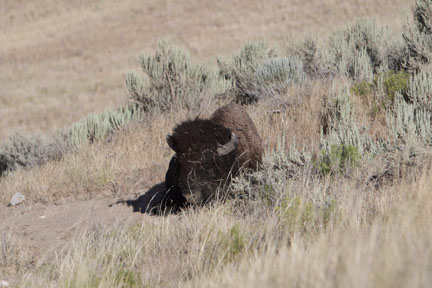
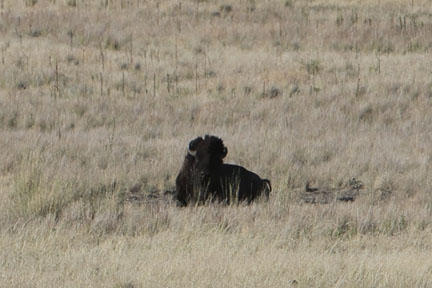
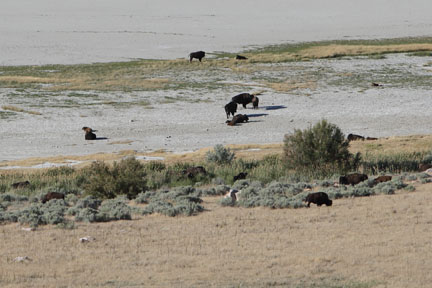
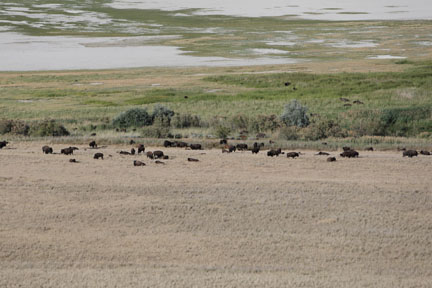
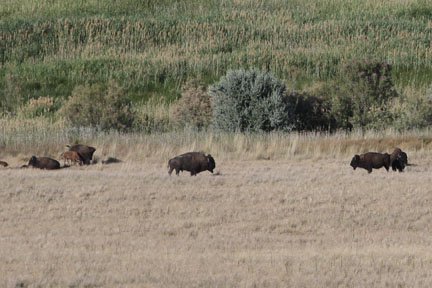
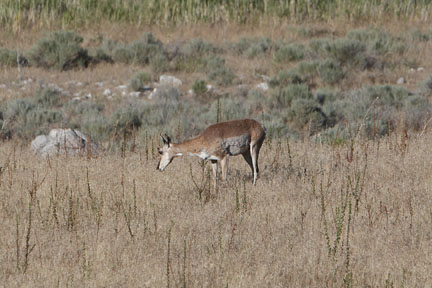
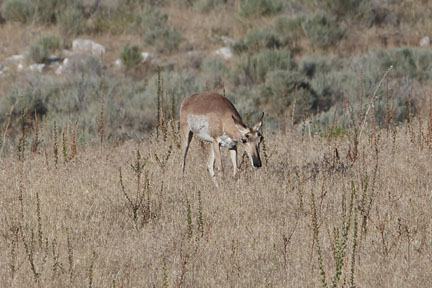
There’s all kinds of wildlife to be seen on Antelope Island. Deer, bobcat, coyote, bison (buffalo), birds and waterfowl are the animals that make Antelope Island their home. The buffalo on the island are actually bison. We have always called them buffalo, who knew there was a difference?
Birds
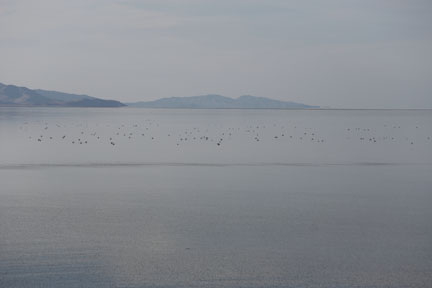
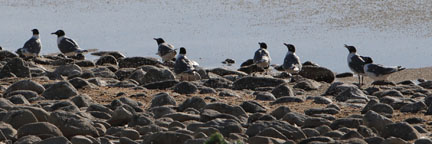
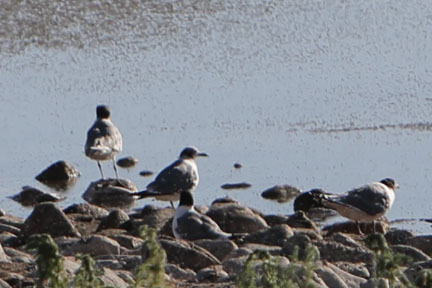
There are many birds that make Antelope Island their home. For the most part, you will find them close to the water or on the water.
American Bison/Buffalo
On Antelope Island there are approximately 600 American Bison that wander the island. This was the first time we had a hard time finding where they were. Occasionally, you will see one or two off by themselves. Just before we got the photo, of the lone buffalo, he was rolling in the dirt. It was really something to see.
There are a lot of things you can do on Antelope Island. There are opportunities for hiking, biking, horseback riding, camping and swimming.
People find the Great Salt Lake amazing, as it has more salt than the ocean and you can kind of float on the water. There is also a gift shop and Visitor Center. We visited in July and the Visitor Center closed at 6:00 p.m. So, be aware of the times the visitor center is open. From their site it looks like it closes at 6:00 p.m. or 5:00 p.m. depending on time of year you visit. It opens at 9:00 a.m. all year round.
Biking
Many people like to bike around the island. There aren’t biking lanes, so you have to share roads and trails with cars and people. I don’t know if there are specific rules for biking/mountain biking on the island. If this is something you are interested I recommend calling ahead and asking questions. There aren’t bikes to rent so you need to bring them with you.
Boating/Kayak and Paddleboards
There is a marina, but we didn’t see any boats. Like I said, the lake is really low. This isn’t a good place to get out onto the water with a boat when there is a drought. There are other places around the lake that are still accessible and good for boating. The rental site also offers a sunset dinner cruise. (Availability varies)
Other things like kayaks and paddle boards are great even when the lake is low.
Rentals are based on availability and lake levels.
Horseback Riding
On the East side of the island is the Fielding Garr Ranch. Here you can rent horses to ride on the island. You need to make reservations in advance and there are a few rules to follow. The cost begins at $55 per person for a one hour ride.
Camping
There are a few areas for camping in tents or RV. However, there are no hookups. Reservations for campsites.
Concessions
There is one place you can get food, the Island Buffalo Grill. It is open from March 1- November 1. The park closes at 10 p.m. in the summer time, but I think the concessions close much earlier. Check out their menu.
If you are gluten free this isn’t a very good/safe place to eat. We take our own food in a cooler and then get something more substantial in Syracuse, Layton or Bountiful. We often use the app: findmeglutenfree to help us decide where we want to eat.
Some of our favorites nearby are: Costa Vida, Red Robin, and Joy Luck.
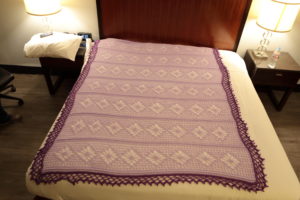
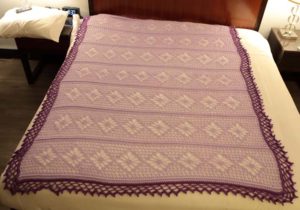
We felt so helpless when my brother-in-law, suddenly passed away in January. He lived about 12 hours away from us and there was so much red tape to get through. His friends were very much family to him and Cassey is one of the best! She was there for him, through thick and thin and we felt so much gratitude toward her.
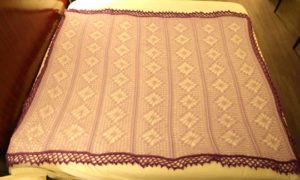
I decided to make her an afghan to thank her for all she has done. She was there when he passed away and was instrumental in helping make final arrangements. We can never thank her enough for all she did for Mike.
Purple Cassey
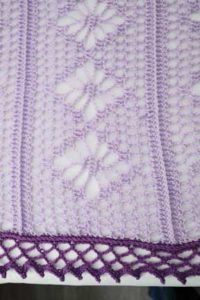
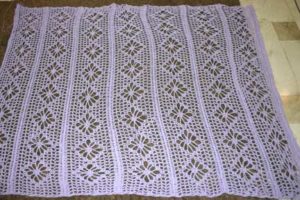
I made the afghan purple, because purple was Mike’s favorite color. I made it more lacey looking, for Cassey.
This post contains affiliate links. I include these links for your convenience to be able to find similar items to what I am using. I earn a small commission for the referral, but your price remains the same.
Materials:
crochet hook K
(I didn’t keep track, very well, of how much yarn I used. Guessing I would say 8-10 skeins of the lighter purple and 2 of the contrasting darker color.)
The main color of this afghan is orchid
The contrasting color is a deep purple (this is the purple Mike loved)
Stitches:
sl= slip stitch
ch= chain
sc= single crochet
dc= double crochet
sk= skip
tr= treble
When slip stitching in front loops, that means to only go through the front loop, yarn over and pull through both loops.
dc back loops- only put your hook through the back loops and double crochet like you are used to doing.
Directions:
Ch 145
Row 1: sc in second ch from hook, sc across
Row 2: ch 3, turn, counts as 1st dc, dc across (144)
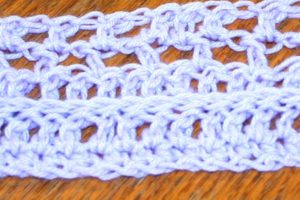
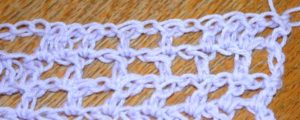
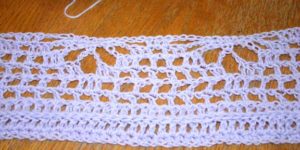
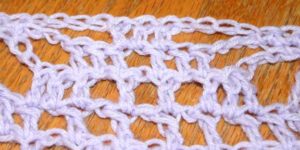
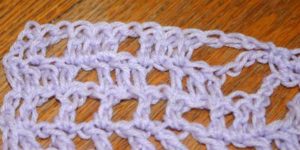
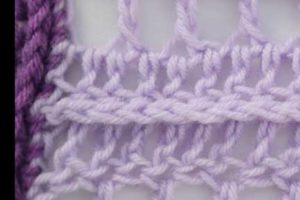
You can see the raised ridge that is created by slip stitch crocheting in the front loops.
Row 3: ch 1, turn, slip st front loops
Row 4: ch 3, dc back loops
Row 5: ch 4 turn (1st dc &h 1), sk 1 dc, dc, ch sk 1 dc, dc in last ch 3 space
Row 6: ch 3, dc, *ch 1, skip 1, dc in dc, repeat this 7 times, after the 7th dc, dc in ch space, dc in next dc, repeat the whole sequence from the * across. There should be 6 dc posts between each cluster of 3. 8 sets of 3 dc together. (Ends with 7 dc posts)
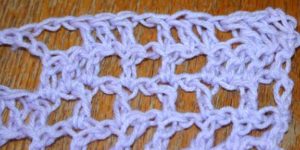
The square boxes have clusters of 3 and there are 6 dc posts between the clusters.
Row 7: ch 4 turn, dc in next dc, *ch 1, skip 1, dc next dc, repeat this sequence 5 times, dc in next ch space, dc in next dc, ch 5, skip 1 dc, dc next dc (last dc in set of 3 on previous row) repeat from * across. (1st set has 6 dc posts. 4 dc post between the rest of the sets) dc in last 3 dc and dc in top of ch 3
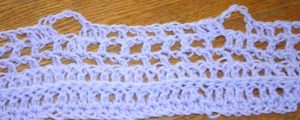
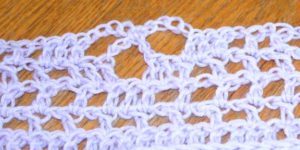
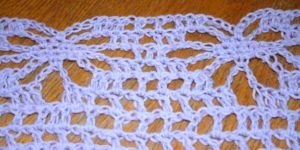
Here we begin to make the bottom of the flower.
Here’s what the end of the row looks like
Row 8: ch 3, dc, ch 1, dc, dc in ch, dc in dc, *ch 1, skip ch, dc in dc, ch 1, skip ch, dc in dc, ch 1, dc, dc in ch 1 space, dc in dc, ch 4, skip 2 dc, skip 2 ch, sc in 3rd ch space, ch 4, skip 2 ch, skip 2 dc, dc next dc, dc in ch, dc in next dc space, repeat across * ( 2 posts between sets of 3, 17 sets of 3) row ends with a ch 1 dc in top of ch 3
Now, we have the bottom 3 petals!
Row 9: ch 3, dc in ch, dc in next dc,* ch 1, skip ch, dc in next dc, dc in ch, dc in dc, ch 4, skip 2 dc, skip 3 ch, sc next ch, sc in sc, sc in next ch, ch 4, skip 3 ch, skip 2 dc, dc in last set of 3 dc, dc in ch, dc in next dc, repeat across * row ends with 4 dc in last 2 chs and 2 dcs (this row begins with 3 sets of 3 and ends with 3 sets of 3, 2 sets of 3 between the chs and 3 sc in the middle of the chs)
This takes us to the middle of the flower.
This is how the end of the row looks
Row 10: ch 3 dc, ch 1 skiip dc, dc next dc, dc in ch, dc next dc, ch 1 skip dc, dc next dc, dc in ch, dc in dc, *ch 4, skip 2 dc, skip 3 ch, sc in ch, sc next 3 sc, sc ch, ch 4, skip 3 ch, skip 2 dc, dc in next dc, dc in ch, dc in dc, repeat across from * (row ends with 2 sets of 3 dc, ch1 and a dc on the very end in the top of the ch 3)
Notice how there is just one group of 3 between the 2 flowers
End of the row
Row 11: ch 3 turn, dc in ch, dc next dc, ch 1 skip dc, dc next dc, ch 1, dc in ch, dc, ch 1 skip dc, * dc next dc, dc in next 2 ch, ch 4, skip 2 ch, skip 1 sc, sc in next 3 sc, ch 4, skip sc, skip 2 ch, dc next 2 ch, dc in next dc, ch 1, skip dc, repeat across * end of row ch 1, skip dc, dc next dc, dc in ch, dc next dc, ch 1 skip dc, dc next dc, dc in ch, dc last 2 dc
This row has 2 sets of 3 between flowers
Row 12: ch 3 turn, dc 2nd dc, ch 1, skip, dc next dc, ch 1 skip, dc next dc, ch 1 skip, dc next dc, * ch 1 skip, dc next dc and in next 2 chs, ch 4, skip 2 ch skip 1 sc, sc in next, ch 4, skip 1 sc, skip 2 chs, dc in next 2 chs and next dc, ch 1, skip dc, dc next dc, ch 1 skip ch, dc next dc, repeat across * (2 sets of dc posts between sets of 3 dc) row ends with 2 posts between 2 sets of 3 dc, ch 1 dc in top of ch 3 of last row.
Between the flowers there are 2 sets of 3 and 2 single dc posts
Row 13: ch 3, dc in ch, dc next dc, ch 1, skip dc, dc next dc,ch 1 skip, dc next dc, ch 1, skip, dc, ch 1, skip, dc, ch 1 skip dc, ** dc next dc, dc next 2 chs, ch 1 skip 2 chs, skipsc, skip 2 chs, dc next 2 chs an in next dc, ch 1 skip dc, dc next dc, *ch 1 skip ch, dc next dc, 3 times, ch 1 skip dc, repeat across from ** (4 dc posts between sets of 3) end of row 4 dc
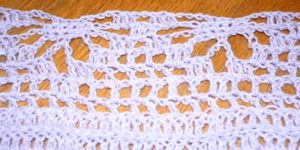
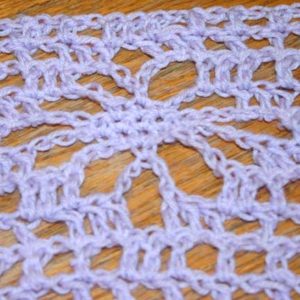
This row closes your flower. It looks so pretty with a diamond shape in the center of the petals.
Row 14: ch 3, dc next dc,* ch 1, skip dc, dc next dc, repeat 7 times, dc next ch, dc next dc, repeat from * across, (6 dc posts between sets of 3) dc in top of ch 3
Row 14 is just like row 6
Row 14 gives stability to the flower
Row 15: ch 3, turn,dc in dc, * ch1 skip 1, dc next, across, dc in ch
Between each section of flowers is this grouping that adds stability to the project and has a row of slip stitch that makes this ridge. Make sure the ridge is always on the same side of your work. The side with the ridge is the right side.
Row 16: ch 3, dc in each ch and dc across
Row 17: ch 1 turn, slip stitch front loops across
Row 18: ch 3, turn, dc in back loops across (144)
Rows of flowers
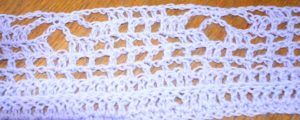
Row 19-84: repeat rows 5-18 (You will have 7 sections of flowers)
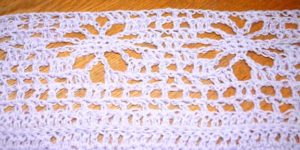
7 sections of flowers
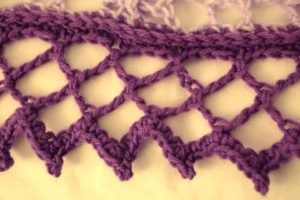
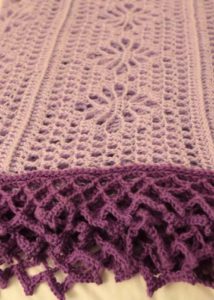
Lattice Border
Row 1: With right side facing you join contrast with a slip stitch, sc across, sc in same sc you did slip stitch.
2 sc each corner
228 sc on each side
Row 2: slip stitch to join in 1st sc, ch 1, sl front loops, join with sl in 1 st ch
Row 3: Don’t turn, sc in back loops behind sl stitches, 2 sc in each 2 corner scs
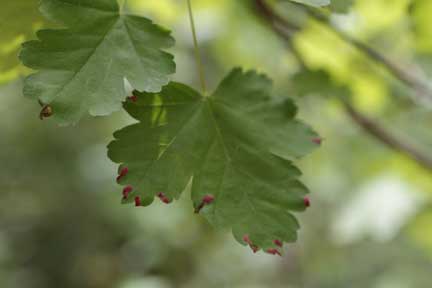
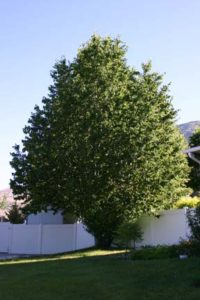
Our poor tree! It was dripping all kinds of liquid and it’s leaves were curling. The tree looked like it was raining! Turns out we have aphids!!! When we visited our local nursery to ask for help in what to do about these aphids they told us that this year the aphids are really bad every where.
These insects can cause damage to plants and trees, when they are in large numbers. Where there are a lot of aphids, the tree can be covered with a “honeydew” substance that drips. This substance is created by the insects waste and is a sign that they are feeding on the tree. This liquid substance is sticky and can cause mold to grow on the leaves and make them turn black
How Do You Spot Aphids In Your Trees Or Plants?
Look for leaves that curl.
Are the leaves turning yellow?
Are there stunted, funny shaped leaves?
Look under the leaves for evidence of aphids
Ants are often found around trees and bushes where there are aphids. The ants like to gather the sticky substance.
Wet leaves
How To Get Rid Of Aphids
If you have curling leaves it is hard to get anything to fight them, because the curling leaves protect them from chemicals, water and predators. At the nursery, we were told that when the weather heats up (Which it isn’t doing very quickly, here. This weekend we dropped back down to the high 70s low 80s.), the population of aphids decreases naturally.
Spray with cold water to get them off of the leaves
If there are a lot of aphids, dusting the leaves with flour can constipate the insects.
Following the instructions for insecticidal soaps, Neem oil or horticultural oils.
Spray the leaves with water and dish soap (We had friends recommend this. We did it to some of our bushes and other plants.)
Insecticides
Lady bugs (This is the method we chose to try, besides spraying the tree with water.)
Why We Chose Ladybugs To Fight Our Aphid Infestation
The tree is really, really tall! There is no way we can completely spray all the leaves and get all of the aphids out! With the leaves curling, many of the insects are protected from the water or any other chemicals.
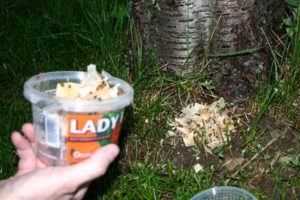
We figured the ladybugs would be able to crawl all around the leaves and get to the top of the tree. At the nursery, they told us that aphids are ladybugs favorite meal! The ladybugs will stay and eat the aphids and then move on. Of course, some will fly away, but many will stay because you have provided a good source of food.
This post contains affiliate links. I include these links for your convenience to be able to find similar items to what I am using. I earn a small commission for the referral, but your price remains the same.
The Release
We put ladybugs out 3 times. The first time we did the full container from the nursery. We followed the instructions of keeping them in the refrigerator until we were ready to release them at dusk. Before letting the ladybugs out we wet down the grass and sprayed the tree with water. Then, we released some in to the wet grass and misted them a bit. (Wet wings don’t fly.) My husband put some up on the branch and lodged the container on its side so they could crawl out higher up.
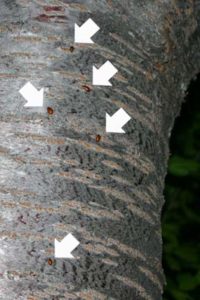
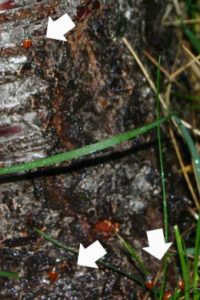
Another thing we were told at the nursery is that if we spray the ladybugs with sprite it makes their wings sticky and they will stay around longer. (We didn’t try that and they seem to be staying around to enjoy the massive amounts of aphids.)
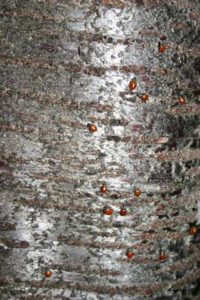
It was fun to watch them make their way up the tree trunk! We enjoyed watching them.
Several days later, we released 1/2 of the second container. Following the same pattern as the first time except for leaving the container in the tree. After a few more days, we released the rest of the lady bugs.
For the first few days, we would go out and count how many ladybugs we could see. It was so nice to see them. We even saw some young ladybugs, which don’t really look like ladybugs, when they are young. Unfortunately, I know the birds thought the ladybugs were for them. The food chain can be brutal and make things difficult.
Every time we put ladybugs out, the birds would fly around like crazy making all kinds of noise!
The Results
The tree quit dripping! Yea!!! It was such a mess and my neighbor parks his truck near that tree and wasn’t happy with that mess all over his truck! Also, the leaves started to look healthier. There are still aphids, but it is getting better. I can still see some wet leaves as I look up into the tree. We may do another release at the end of this week or beginning of next week.
I am hopeful. I was able to count several ladybugs this morning! They are sticking around.
I was so excited to get all of the materials for Mother’s Day to make a new Fairy Garden!
It may end up being an example of erosion and why there are dangers to building your house on a mountain, hill or cliff-side. In any case, I really like how it turned out.
This post contains affiliate links. I include these links for your convenience to be able to find similar items to what I am using. I earn a small commission for the referral, but your price remains the same.
Materials for Hillside Fairy Garden
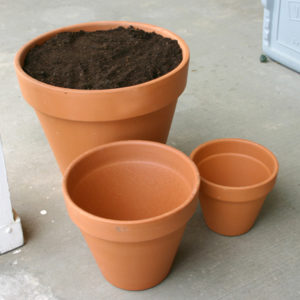
3 clay pots- 1 large, 1 med and 1 small
I was so excited, I forgot to get a picture of the 3 pots together, before I started.
Potting soil
Rocks
Fairy house, fairies and other fairy accessories
Small flowers
Hillside Fairy Garden Instructions
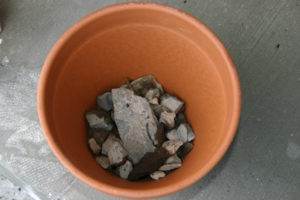
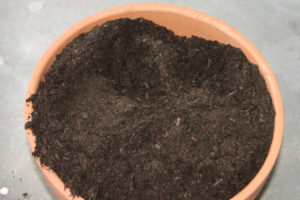
I like to fill the bottom of the pot with rocks. There are soooo many unwanted rocks in my yard and so it isn’t a problem to find them. The rocks are to give your pot some drainage. In a large pot, like the bottom one, used, putting things in the bottom like a coffee can or plastic bottles helps to take up some space and you don’t have to fill it with as much dirt. This will make your big pot easier to move around, because it will be lighter than had you filled the whole thing with dirt. Your flowers roots won’t go very deep anyway. I didn’t have the right size bottles to put in the bottom and so I just did rocks and a lot of dirt.
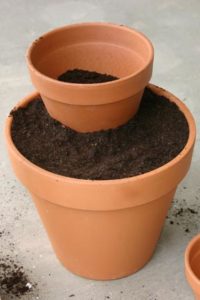
You want to make a hole in the dirt to put your medium sized pot in.
Nestle the medium pot into the hole. I also put some rocks and a little dirt in the medium pot. (I wonder if it would have broken better had I filled it with dirt.) It was more difficult to break the pot, the way I wanted it broken! Much more of the side broke away, than I had anticipated. I think I hit it a little too forcefully with the hammer.
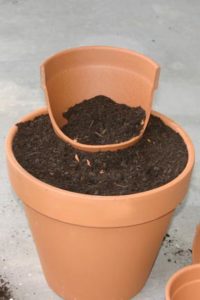
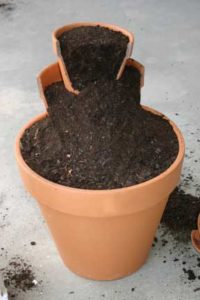
I then had to try and build up the dirt in the very broken pot. Adding quite a bit of water to the dirt, helped it compact together. I made a hole to put the smaller pot in and doing smaller (gentler) taps with the hammer, I was able to break away less of the smaller pot than I had with the medium pot. I also filled it with soil and wet it down some before breaking away the side.
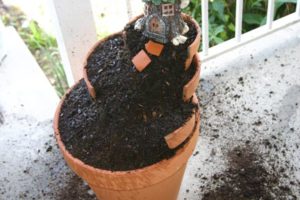
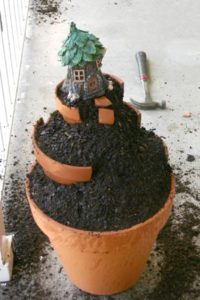
The medium pot was missing so much side it was making it hard to build up the dirt to decorate. When the pot broke, luckily it broke into large pieces. I took the large pieces from both pots and used them as you can see here. One is close to the medium pot towards the top on the left side and the other is a bit lower to help hold back the hill of dirt I am trying to form.
I continued to spray down the dirt and tried to compact it, as I built it up.
Here’s a better view of the left side and how I used the big broken piece to hold back dirt.
Next, I planted my flowers. I chose ones that had smaller flowers and had a lot of interest.
Sweet Potato Vine “Lime” (greenery)
Bacopa (the little white flowers)
Calibrachoa Blue (the purple flowers)
Dianthus (they will be pink when they blossom)
Celosia (My husband commented that they look like brightly colored fairy trees)
Add your fairies
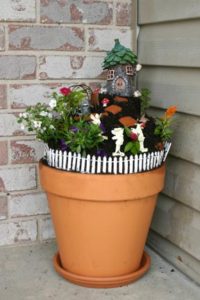
Next, it is time to add your decorations. I put the house on the top and there really wasn’t room for much else. I broke up some of the side that I broke out of the 2 pots and used them for pathways. I had this cute fence from my fairy garden from last year that helped to hold back more of the dirt.
After a couple of weeks of growth
I used a spray bottle to water the plants for the first little while, so as to not disturb the dirt too much. I knew that once the roots started to take hold and the plants started to get bigger the dirt would be more stable. I recently found that my sprayer on my hose has a mister and that has made watering it much easier. It has helped the house on the hill to stay still.
I couldn’t help myself! As I was searching for Father’s Day gifts I kept seeing all these great ideas for first time fathers!
1st Father’s Day
The first Father’s Day is so special! The excitement in beginning a growing family and the milestones throughout that first year!
This post contains affiliate links. I include these links for your convenience to be able to find similar items to what I like. I earn a small commission for the referral, but your price remains the same.
Books to Read with Dad
A special book about Dad is a fun way for dad and baby to bond. There’s something special about dad reading to his child.
“Just Me and My Dad”
“My Dad Loves Me”
“Papa’s Day Surprise”
Always Remember
Wouldn’t it be great if we could bottle these special times up and keep them forever? That is what makes pictures so great. These frames will help you capture those special moments to be seen and remembered frequently.
This frame is personalized to Daddy from Baby (name and date)
Mommy, Daddy and Me Frame
Having a visual of just how small the hands and feet were and remembering how tiny that hand was in your big hand is a gift to treasure forever.
A sweet poem from your newborn to Daddy.
Miscellaneous for Dad
This Daddy mug is fun and useful, commemorating 2018 as the year you became a Dad.
This bamboo cutting board can be hung up for decoration and use the other side for chopping.
Daddy Clothing for 1st Father’s Day and more
T-shirts that say it all.
Achievement- Unlocked- Fatherhood
The Daddy
This is what an awesome Daddy looks like
Daddy and Me Outfits
I love this idea!!!! How cute to have matching outfits for Father’s Day!
Captain and First Mate
The Legend- The Legacy
“Keep Calm. . . ” shirts
“World’s Best Farter, I mean Father” and “Like Farter Like Son”
Copy and Paste
Baby Celebrates Daddy
Dressing baby for Father’s day!
I love this very helpful instructions onsie! Dad should have no problem figuring out how to dress this little one!
So sweet for a baby girl who absolutely loves her daddy!
“I never dreamed I’d have the world’s greatest daddy, but here he is killin’ it”
“I’m your Father’s Day gift– Mom says you’re welcome”
“Happy 1st Father’s Day Daddy”
I hope you and Daddy enjoy your first Father’s Day!
Geek dads make it easy to shop for them! There are so many fun things to be found for the dad who loves Star Wars, Marvel and Doctor Who! I have put together 20 ideas for this Father’s Day.
This post contains affiliate links. I include these links for your convenience to be able to find similar items to what I like. I earn a small commission for the referral, but your price remains the same.
Star Wars
“Every Great Father teaches his children the ways of the force”
“Free Words of Wisdom” Great lines from Yoda.
Star Wars Millennium Falcon tie
Keep dad’s feet warm with Star Wars socks! Darth Vader, Storm Trooper, Chew Bacca, and R2 D2
I love this mug! “Dad: You are MY FATHER”
Light up his world with this LED 3D lamp illusions-4 patterns, 7 colors to choose
Marvel
This fun knife set has the cosmos on each blade.
Thor’s Hammer key chain
Marvel tie- understated fandom in this Marvel tie. Gray on gray designs from Marvel.
LED 3D illusion Spider-Man Light- Great for a mancave!
Something dad can take to work and keep on his desk. Stress relieving ellipsoid spinning top. While not really Marvel related, it is a marvel with how it spins and reduces stress.
It is almost Mother’s Day and the question is, “What to give mom?!” It can be difficult to come up with ideas for our mothers. Typically, mothers don’t like to ask for things. So, here’s a list of ideas to help you get started.
This post contains affiliate links. I include these links for your convenience to be able to find similar items that I like. I earn a small commission for the referral, but your price remains the same.
Kitchen
There are always wants and needs in the kitchen. So many new things come out that we want to try or our things wear out and need to be replaced.
On my list here: Instant Pot, Air Fryer, Kitchen Aide and crockpot. A quick note about each one.
Instant Pot
It is a pressure cooker mixed with a crockpot. Cooking times are sped up when using this appliance and there are so many helps and recipes to be found online. Check out this blog about the instant pot and why people think they are so great!
Air Fryer
I love my air fryer! It is my favorite new kitchen appliance, but I really want a bigger one! I have used it for lots of things. Check out my post about my air fryer obsession!
Since I don’t, yet have an instant pot I can’t tell you whether or not having one makes the crockpot obsolete. So for now, I believe every kitchen needs to have a crockpot! We use our every Sunday for family dinners. It is a life saver on busy days. It usually doesn’t take very long to put the ingredients in and then not worry about it for the rest of the day! I love the ones that are programmable and turn themselves to warm!
Fairy Gardens
I have been in love with fairy gardens since my girls were small. In more recent years I have had time, energy and money to put into creating them. Having cute things added to my garden each year is a fun idea!
For the Mom who loves to garden
Gardening is one of the things that helps me when I am stressed. There is something about working the earth with your hands.
Bath Luxury
A time to relax and unwind is necessary for every mother! These gifts can help give her encouragement to take to pamper herself.
Jewelry
Moms love jewelry. I for one love jewelry that reminds me of my children! I love the representation of each child with their birthstones.
I hope these ideas are helpful to you and you and your mom have a wonderful Mother’s Day!
Recent Comments