I was so excited to get all of the materials for Mother’s Day to make a new Fairy Garden!
It may end up being an example of erosion and why there are dangers to building your house on a mountain, hill or cliff-side. In any case, I really like how it turned out.
Materials for Hillside Fairy Garden
3 clay pots- 1 large, 1 med and 1 small
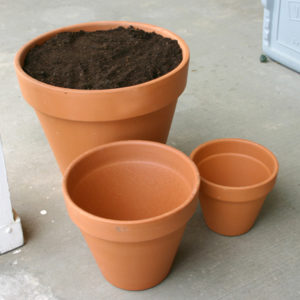
I was so excited, I forgot to get a picture of the 3 pots together, before I started.
Potting soil
Rocks
Fairy house, fairies and other fairy accessories
Small flowers
Hillside Fairy Garden Instructions
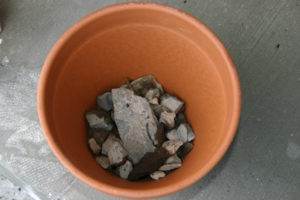
I like to fill the bottom of the pot with rocks. There are soooo many unwanted rocks in my yard and so it isn’t a problem to find them. The rocks are to give your pot some drainage. In a large pot, like the bottom one, used, putting things in the bottom like a coffee can or plastic bottles helps to take up some space and you don’t have to fill it with as much dirt. This will make your big pot easier to move around, because it will be lighter than had you filled the whole thing with dirt. Your flowers roots won’t go very deep anyway. I didn’t have the right size bottles to put in the bottom and so I just did rocks and a lot of dirt.
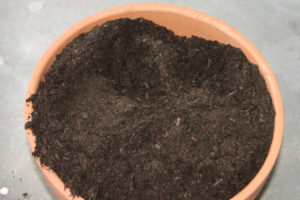
You want to make a hole in the dirt to put your medium sized pot in.
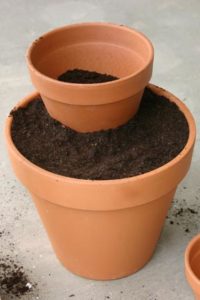 Nestle the medium pot into the hole. I also put some rocks and a little dirt in the medium pot. (I wonder if it would have broken better had I filled it with dirt.) It was more difficult to break the pot, the way I wanted it broken! Much more of the side broke away, than I had anticipated. I think I hit it a little too forcefully with the hammer.
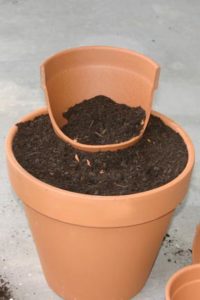
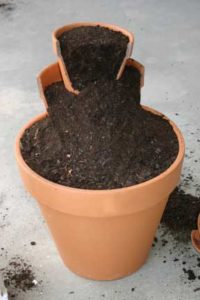 I then had to try and build up the dirt in the very broken pot. Adding quite a bit of water to the dirt, helped it compact together. I made a hole to put the smaller pot in and doing smaller (gentler) taps with the hammer, I was able to break away less of the smaller pot than I had with the medium pot. I also filled it with soil and wet it down some before breaking away the side.
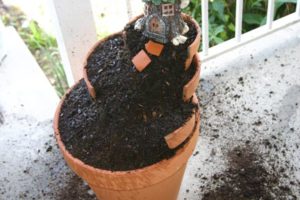
The medium pot was missing so much side it was making it hard to build up the dirt to decorate. When the pot broke, luckily it broke into large pieces. I took the large pieces from both pots and used them as you can see here. One is close to the medium pot towards the top on the left side and the other is a bit lower to help hold back the hill of dirt I am trying to form.
I continued to spray down the dirt and tried to compact it, as I built it up.
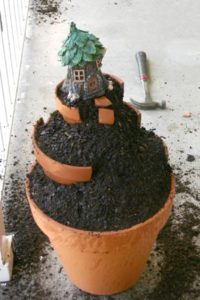
Here’s a better view of the left side and how I used the big broken piece to hold back dirt.
Next, I planted my flowers. I chose ones that had smaller flowers and had a lot of interest.
- Sweet Potato Vine “Lime” (greenery)
- Bacopa (the little white flowers)
- Calibrachoa Blue (the purple flowers)
- Dianthus (they will be pink when they blossom)
- Celosia (My husband commented that they look like brightly colored fairy trees)
Add your fairies
Next, it is time to add your decorations. I put the house on the top and there really wasn’t room for much else. I broke up some of the side that I broke out of the 2 pots and used them for pathways. I had this cute fence from my fairy garden from last year that helped to hold back more of the dirt.
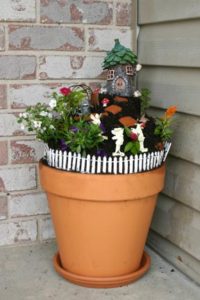
After a couple of weeks of growth
I used a spray bottle to water the plants for the first little while, so as to not disturb the dirt too much. I knew that once the roots started to take hold and the plants started to get bigger the dirt would be more stable. I recently found that my sprayer on my hose has a mister and that has made watering it much easier. It has helped the house on the hill to stay still.
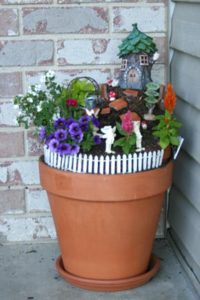
Here is what the planter looks like today: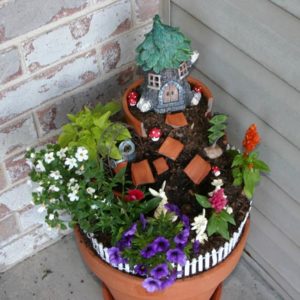





Leave a Reply
Your email is safe with us.