I have these large planters that sit on my porch all summer long. In the winter, I move all except for the biggest planter off of the porch. However, I saw somewhere on Pinterest several ideas for using a tomato cage, large planters and Christmas lights to decorate. They were all done in different ways. I decided to give it a try.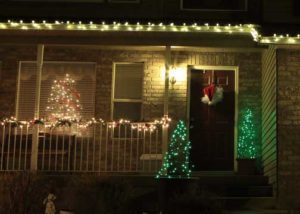
Supplies for Tomato Cage Christmas Tree
(Supplies are for 1 tree)
Tomato cage
Large planter box
Twist tie or zip tie
Stakes
100 strand green Christmas lights
Extension cord
Putting it together
Use your large planter box for the base of your tree. There are different size tomato cages mine barely fit into this box. The other one I made held a little bit bigger tomato cage than this one did.
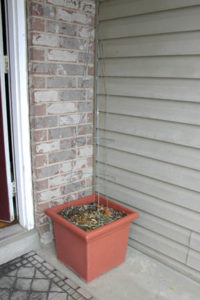
If you look closely, you can see that the round top of the tomato cage barely fits inside the box.
Step 1
Place the tomato cage upside down in the dirt of the planter. Use a twist tie, zip tie or twine to hold the ends of the tomato cage together.
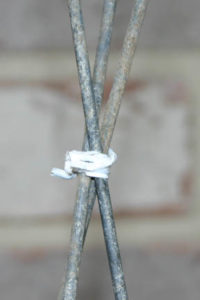
Saving twist ties- comes in handy!
Step 2
I took the lights in a 1/2 circle around the tomato cage. So, starting toward the back/side, first stake the lights and leave enough room to be able to plug your lights into your extension cord. I kept mine plugged in while I worked so I could check on how it was looking. Even still, it will look better in the dark than while you are working on it.
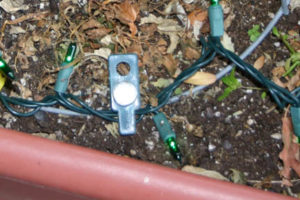
I used old tent stakes that we have, but any stake should work. I made sure the stake not only held the lights in place but also the cage. If your cage isn’t secure it could blow over in the wind. (We haven’t had wind or snow, yet, this year.
Step 3
After the end is staked, string the lights up through the top of the cage and then back down. You can either work your way across from side to side or go up and down working your way from one side, across the front and to the other side. You want to make sure you are making them as evenly spaced as possible.
With my bigger one I went from one side across the front and to the other side, but the smaller one worked better to go from side to side and ending in the front.

This is as far back as I did any lights. There are no lights that come down in the back.
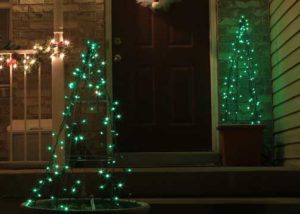
The tree in the front was a bigger cage and bigger planter. I did some strands close to the cage and took others farther out. The second tree barely fit in the planter and so all the strands are close to the tomato cage.
The lights sit nicely in the top and don’t need to be secured any further.

Step 4
If your strand ends somewhere between the top and bottom secure it in place. The ideal is if it ends at the top to be secured there or at the bottom where it can be staked. Just make sure it looks the way you want it to look. The first one took me 2 or 3 times, but the second one was done the first time.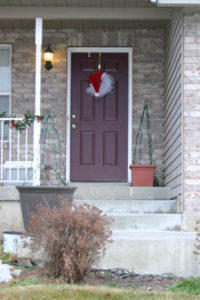
I love the way they look at night!
Please Share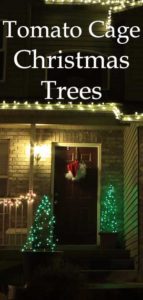


Leave a Reply
Your email is safe with us.